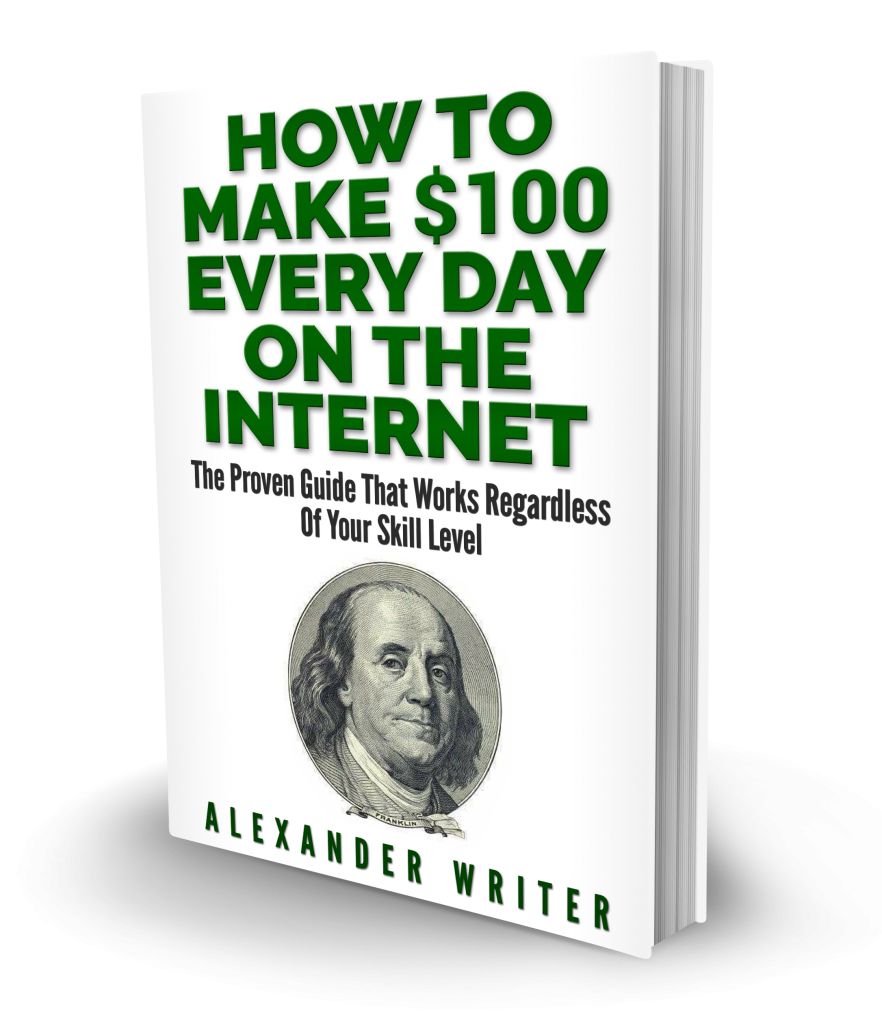
UPDATE: My new book “How to Make $100 Every Day on The Internet” containing my NEWEST strategies for making money is now available. Click here to learn more and download your copy now.
So you want to create a blog from scratch that makes money daily and forever, do ya?
Great!
Many people are searching the internet RIGHT NOW to learn how.
Lucky for you, you found this article which will teach you everything you need to know.
This article is long…VERY long.
But, it’s 100% FREE and shows you the real way to make money online.
…So be patient and read it from start to finish.
Before we begin, I want to make one thing clear:
Earning money online is NOT hard.
Yes, it requires work, but it isn’t hard work.
In reality, it’s just busy work.
If you’re not willing to put in the time and do the busy work, this article isn’t for you.
Stop reading right now because I’m not here to waste anyone’s time.
I consider making money online SERIOUS business.
I’m putting in the time by sitting down and writing this for you.
I could be doing something else like fishing, mountain biking with my best friends, or spending time with my girlfriend; but I’m sacrificing in order to write this article.
So, if you’re serious about making money, then keep reading.
Let’s not waste any more time and get right into it.
Before we start, I recommend you save this article to your favorites on your internet browser so you can refer to it as much as necessary.
Gentlemen, start your engines…
Here we go!!!
1) Domain Name
The first thing you need to do is decide on a domain name.
A domain name is your website’s address.
For example, this blog’s domain name is:
www.Inertiawillhurtya.com
The best advice that I can give you domain name wise is choosing something that’s relevant to your blog’s content.
In other words, something that immediately tells others what you write about.
Is it relationships?
Money?
Dieting?
How to play guitar?
Whatever it is, select an appropriate name.
Now, if you’re going to write about different topics, then obviously this won’t be possible.
In this case, choose a domain name that’s easy to spell and remember.
At the end of the day, your domain won’t be the most important reason for your success.
However, if people have a hard time spelling or remembering it, it can hurt your success.
The moral of the story? Don’t get all fancy and creative.
Choose something simple and memorable.
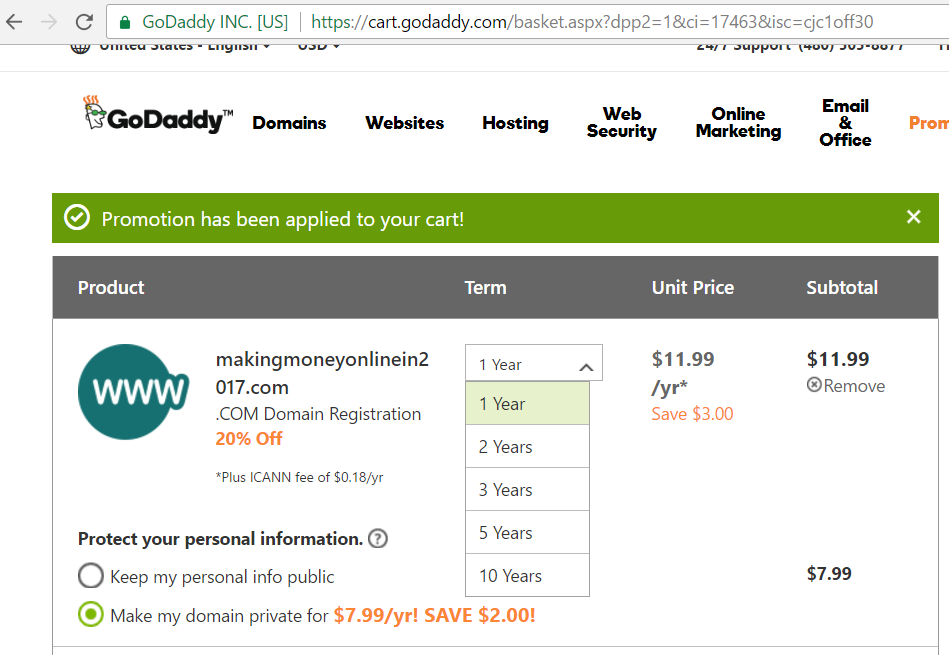
Once you’ve decided on a domain name, you’ll have to get it registered with GoDaddy.
This will give you the rights and ownership.
In other words, only YOU will be allowed to use that name online.
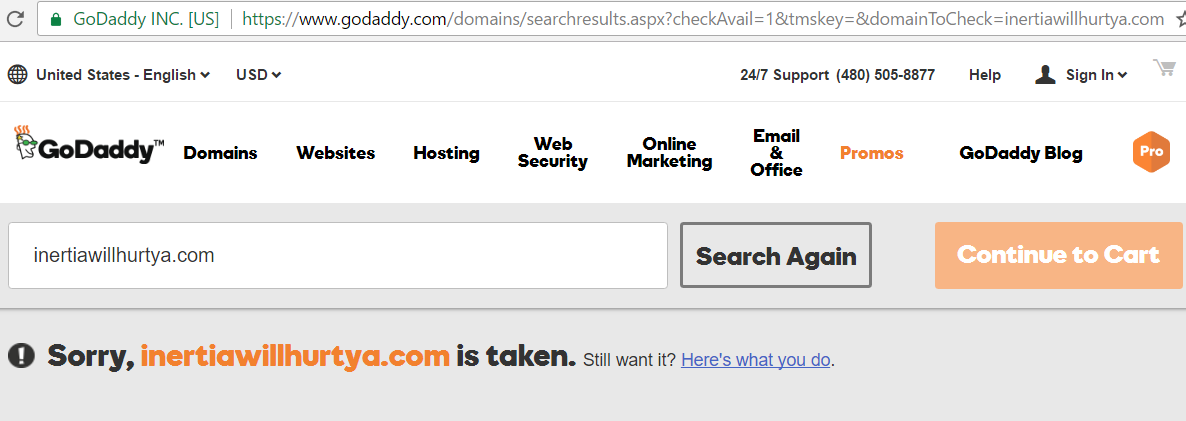
Right now, no one in the world except me has rights to Inertiawillhurtya.com.
Unless I agree to sell it, no one can touch it.
Let’s go over how to register a domain name with GoDaddy.
It’s easy!
2) GoDaddy
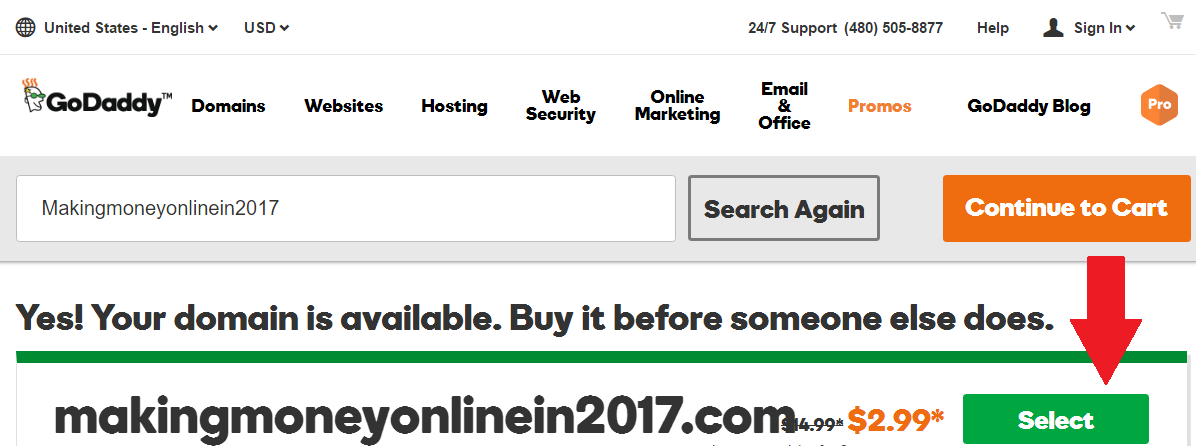
Once you decide on a domain name, go into GoDaddy and verify if it’s available.
If it isn’t, try a different name.
Once you find one that’s available, go ahead and purchase it.
Make sure you register a “.com” domain.
Domains that end in .com are perceived as more credible and trustworthy.
Keep away from domains that end in: .net, .org, .co, etc.
GoDaddy allows you to purchase the rights to the domain for 1, 2, 3, or 5 years.
Choose the 1 year plan so you don’t spend more money than necessary.
GoDaddy will email you when it’s due for renewal.
Make sure you choose private registration to protect your personal information.
Congratulations, you’ve successfully registered your domain name!
Now it’s time to get it hosted (live) online!
3) Host Gator
Hosting is what makes your website accessible on the internet.
Hostgator does ALL the hard work for you.
They take care of the setup and technical issues.
They also have the best servers to keep your website running fast and efficiently.
Hostgator has been around for MANY years and are a trusted company.
I wouldn’t recommend anyone else.
Go to the Hostgator’s homepage, click web hosting, and then “Baby Plans” option.
This option allows you to host as many different domains as you want without having to pay anything additional every month.
This prevents you from spending additional money in the future if you decide to start another website.
Once you fill out the personal information and complete your order, Hostgator will email you two DNS server numbers.
You’ll need to copy those into your GoDaddy account.
Steps:
1) Go to GoDaddy and click “My Account”
2) Click Manage domains
3) Go to nameservers settings and replace current DNS #’s with the one’s Hostgator provided.
4) Click Save
At this point, you have successfully purchased and hosted your domain name.
Next, we’ll move on to WordPress which is the “behind the scenes” area of your blog.
4) Installing WordPress

Now that you’ve purchased your domain and have it hosted, it’s time to install WordPress through C-panel.
WordPress is what allows you to add content and edit the design/layout of your blog.
NOTICE: It might take a while for GoDaddy to receive the information you provided from Hostgator, so if you keep receiving an “Error Message” in C-panel, it just means that your website is still in progress.
Typically, it’ll take GoDaddy anywhere from a few minutes to a couple hours before your blog is up and running, so just keep checking it.
Once it’s live, the first thing you’ll do is log into your C-panel with your domain name: www.yourdomainnamehere.com/cpanel
Next, click on Quick Install.
Select ‘WordPress’ from the options on the left and complete the information form.
Finally, click Install WordPress.
Once the download is complete, you can begin editing your website.
Editing WordPress Password
The first thing you’ll want to do is change your WordPress password to something much easier than the one provided.
Steps:
1) Type in your domain address followed by ‘wp-admin’ in your URL bar. (www.Google.com/wp-admin)
2) Sign in with the username you selected and the password that WordPress provided you. (Check your email or go back into your C-panel to find it)
3) Go to the “Users Section”, click “Your Profile”, go down to “Account Management” and change your password.
4) Click save
Make sure you pick a password that won’t be easy to guess by others.
I know it sounds like common sense, but many people choose easy passwords like “qwerty1” or “password1”, and wonder why their website gets hacked.
…Don’t be one of the victims.
Now that you’ve changed your password, let’s move on to the settings.
Settings
Make sure you download the latest version of WordPress while in your dashboard.
You’ll notice a notification on your dashboard informing if the latest version is installed.
It’s best to click the link that says “Update automatically” so you don’t have to worry about it.
You’ll always want to have the latest version of WordPress installed so you can keep your website running smoothly.
Next, click on Settings and go into your Permalinks tab.
You’ll want to change it from Default to Post name.
This allows your permalink address to change from the default that will look something like:
Inertiawillhurtya.com/p=35vbwp
To something better like:
Inertiawillhurtya.com/how-to-start-a-blog
The second example looks a lot better, right?
You’ll also want to head over to the Formatting Section and make sure to remove the check from the box “Convert emoticons like 🙂 to graphics on display”
If that box is left checked; anytime you create a list (1-10), #8 will always be converted into a smiley emoticon.
WordPress automatically assumes you’re trying to insert a smiley face when you type “8)”.
Let’s now talk about the necessary plug-ins your website requires for best performance.
5) Plug-ins
Depending on your blog and its goals, there are many plug-ins designed to help you.
Plug-ins allow specific features and benefits for your blog.
Just about everything you see on a website is a plug-in.
(Ex: comment sections, email subscribers list, social media share buttons, etc.)
Below are important plug-ins every blog must have regardless of its goals.
You can do research later and find other plug-ins that will benefit your blog.
NOTE: Adding too many plug-ins can slow down the download speed of your website so ONLY download and activate what’s necessary.
If you’re not using a plug-in, make sure to delete it.
Many people make the mistake of only deactivating a plug-in they don’t use and don’t delete it.
However, don’t be scared to add plug-ins.
Use a website speed check tool to see how long it takes for your blog to load.
A popular one is: tools.pingdom.com
You should aim for an overall score of 70% or higher.
You want your website loading fully in 3-5 seconds, tops!
To add plug-ins: Go to your dashboard, click plug-ins, and “Add New”.
To delete plug-ins: Click on “Installed plug-ins”, click deactivate, and click delete.
Top 12 Must Have WordPress Plug-Ins
1) Google Analytics by Yoast – Allows you to track your website’s traffic
2) Wordfence Security by Wordfence – Allows your website to secured and run up to 50x faster.
3) WP Super Cache – Allows your website to produce static html files quickly.
4) TinyMCE Advanced – Allows you to edit things on your website without any complicated coding required. (Ex: font size and color)
5) Contact Form 7 – Allows your readers to contact you.
6) Jetpack WordPress – Allows you many cool features like: visitor stats, security services, speeding up images, and even helps get more traffic.
7) Google XML Sitemaps – Allows search engines to better index your website. (Very important)
8) Broken link checker – Allows you instant notification of any broken links or missing images on your blog.
9) Backup WordPress – Allows you to save all your data on your website in case it were to crash.
10) Mashare Buttons – Allows you to display social media share icons so readers can share your content on their social media.
11) Limit login attempts – Allows you to prevent being hacked by limiting the login attempts on your blog.
12) Click to Tweet – Allows you to include a “Click to Tweet” button to allow your readers to share a specific sentence from your article. (Great for generating traffic)
6) Theme
I have to be honest, I use to be stubborn about spending money on a theme.
I thought it was ridiculous since WordPress has a HUGE selection of free themes.
My philosophy was:
If your content is good, and your blog is user friendly, nothing else matters.
But what I was failing to realize is that all the free WordPress themes look like crap.
Sure, creating good content can get you far.
Both my sales and audience grew IMMENSELY in 2016 compared to 2015 because of all the quantity and quality content I published.
However, as soon as I purchased MetroTheme at the beginning of this year, I witnessed a BOOST in many things.
I began getting more subscribers on a daily basis, people are staying on my blog longer, and my conversion rate with my eBook sales is higher.
The sales aren’t a HUGE boost, but it’s definitely noticeable.
Keep in mind that I’ve only had this theme for 16 days and am already experiencing these improvements.
Don’t be stubborn like I was and make the same mistake.
Do things right from the beginning and get a professional theme.
FACT: A website that looks professionally designed yields much better results because it’s perceived as trustworthy.
I bought MetroTheme not only because of its slick and attractive style, but because so many successful websites use it.
I discovered that these same websites have been using it for years.
And there’s good reason for it…IT WORKS!
7) Create content
At this point, you’ll have your website live and ready to begin making money.
Let me stop for a moment to say that if you get to this point, you should be proud of yourself.
You’re already ahead of 99% off people who say they want to make money online, but never take any action.
In order to get people to your blog and make money, you’ll need to create content.
Content can be in the form of articles, podcasts, or videos.
I recommend articles because people will find you in Google when they search the internet for something you’ve written about.
For example, go into Google right now and search:
21 things every 21 year old should know
You’ll notice that my website pops up in the search results.
This allows new people to find my blog every single day.
The more people that find my blog, the more money I make.
It’s that easy!
Not everyone that comes to my blog earns me money through the steps we’ll discuss in #8 and #9 below, but the more people that come, the higher my sales.
It’s a fail-proof technique.
So, how do you know what articles to write?
Easy, just write what you know.
Do you know a good diet that you can share with others?
Do you know how to patch a hole on the wall?
Do you know how to approach women without coming across nervous?
Do you know magic tricks?
Whatever you know, create a TON of content about it.
I don’t care what anyone says, the more content you create, the more your website will grow.
I am living proof of this!
Read my article The Power of 1000: A Fail-Proof Plan to Make Passive Money Online for more on this topic.
Again, you need to create content in order to get people (traffic) to your blog, there’s no way around it.
(Also read my article: 17 Easy Tricks to Get More Blog Traffic)
If you can’t come up with anything to write about, don’t worry.
You can start by reading my articles, applying what you learn, and then writing articles about your results.
[bctt tweet=”All blogging is is sharing your experiences while teaching others what you know.” username=””]
8) Create E-books
Before I say anything, I want to make another thing clear…
Writing eBooks is EASY.
No, you don’t need to hire a publisher.
No, you don’t need to spend a lot of money.
Thanks to the power of the internet, you can do it all yourself for FREE!
I didn’t spend a single penny creating my eBooks and all of them make me money continuously.
Beautiful.
I take that back, I spent $5 on each because I hired someone on Fiverr to create the covers for me.
To learn how to create eBooks, read my article:
How to Easily Create Your Own Ebook and Begin Making Money Online.
I’ll even give you a million dollar idea…
Once you start your blog, apply what you learned in this article, and then simply create an eBook about the same information.
People would pay BIG money for what you’re reading right now for free.
Think about it…
9) Monetizing content through affiliate marketing & Google AdSense
I make money with this blog in 3 simple ways:
1) Selling eBooks
2) Affiliate marketing
3) Google AdSense (I don’t always use this option, but it does work)
Affiliate marketing has to be one of the easiest ways to make money.
You simply mention a product that you’ve tried and provide your readers a link so they can purchase it.
If they click on your link and buy, you get a percentage of the sale.
Easy.
Read my article: How I Make Money Daily With My Amazon Affiliate Account (and how you can too)
The next option is Google AdSense.
This is simply displaying ads on your blog generated by Google.
By now I’m sure you’ve seen these ads when you’ve visited other blogs.
They work very well but you need to create a ton of content in order to begin seeing some serious profits.
You’ll see me use them on and off on this blog because I like to test many different things.
However, I use them 24/7 on my niche websites.
Starting a Google AdSense account is 100% free, quick, and easy.
Read my article: How to Go From Zero to $100 Per Day With Google AdSense
10) Commit to a year
This is the most important part.
Some people will follow every step in this article, not earn money after 3 days, and quit.
Others will commit for a month, make some money, but for some weird reason, also quit.
Last is the BIG DOGS!
The big dogs don’t focus on anything except their work ethic for a year.
As the money begins coming in, they ignore it. (As crazy as that might sound)
They stay focused for an entire year and build their empire.
At the end of the year, they’ll be making more money online than they ever thought possible.
Who will you be?
Mr. 3 days?
Mr. One month?
…Or the BIG DOG?
The big bucks won’t come in at the beginning, you first have to build up your blog with content.
But I 100% PROMISE that the more content you create, the more your profits will grow.
Every article and eBook you create is a seed.
The amount of seeds that you plant will determine your success.
So it’s up to you, my friend…
Will you dedicate a little time and have a small garden in a year?
Or will you dedicate a lot of time and have a SUCCESS JUNGLE?!
Choose wisely.
“Slow money is better than no money.
Fast money only comes if you allow slow money into your life first.”
-Alexander Writer
So there you have it, my friend.
I’ve given you all the steps to follow to start a blog from scratch that makes money daily & forever.
This is the exact process that I followed to begin making money, grow my traffic, and my audience.
Follow my steps and you’ll have the same success.
Don’t waste any time, start RIGHT NOW.
You can have everything set up within a day and then simply begin creating content and eBooks.
Actions steps:
1) Choose a domain
2) Register it with GoDaddy
3) Host it with Hostgator
4) Install WordPress
5) Install Plug-ins
6) Purchase the MetroTheme (Optional, but highly recommended)
7) Create content
8) Create eBooks
9) Apply affiliate marketing and Google AdSense
10) Commit to a year
Make it happen!
Talk soon,
-Alexander Writer
PS – Download my NEWEST book “How To Make $100 Every Day On The Internet” because it’s going to show you my ALL my proven ways to make money online.



Al says
My sitessential is proof that what he says works! My site has been live for over a year an although my niche is very small, I still have been able to make money by selling only one book.
Now I don’t make enough to be able to quit my full time job, I now know by experience that if you have knowledge about a subject, apply his steps, you will make money.
Although I believe certain niches make more money than others (especially if you combine many niches into one site) money is there to be made if you work at it.
Heck, I haven’t posted on my site in months and I’m still getting paid.
Thanks Alexander for all that you do.
Alexander Writer says
Good work, Al. Keep going and growing!